|
Configuring Outlook 2000 POP
Secure Domain Email Customers: If your secure email account with us uses a domain name other than 4securemail.com, simply use your domain instead of 4securemail.com wherever it appears in the instructions or the examples given. If you have purchased your own IP address & certificate, you may substitute any reference of mail.4securemail.com with your mail host name, e.g. mail.yourdomain.com.
This item provides information on these topics:
- Overview
- Step 1: Create your Account (Part 1)
- Step 2: Create your Account (Part 2)
- Step 3: Display Name
- Step 4: Server Names
- Step 5: User Credentials
- Step 6: Connection Type
- Step 7: Finish the Wizard
- Step 8: Configuring the Account Settings (Part 1)
- Step 9: Configuring the Account Settings (Part 2)
- Step 10: Advanced Configuration
- Step 11: Servers Configuration
- Manufacturer Technical Support
Overview
This document will help you to configure your Outlook 2000 email client to work with the 4SecureMail secure email system.
To use Outlook for accessing and using your 4Securemail secure email account you should take the following steps:
- Browse to https://officeupdate.microsoft.com
- Click on "Check for updates" before you configure your client to make sure you have the latest updates for your version of Outlook.
- Problems have been noted with some older releases of Outlook with SSL that have been corrected with the latest service pack downloads from Microsoft.
Step 1: Create your Account (Part 1)
- Open Outlook.
- Select the "Tools" pulldown menu and select "Accounts."
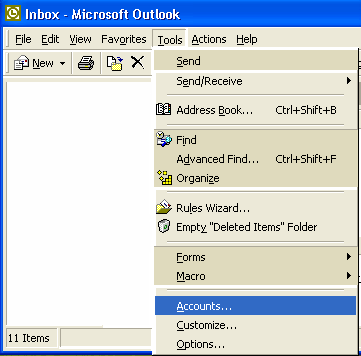
Step 2: Create your Account (Part 2)
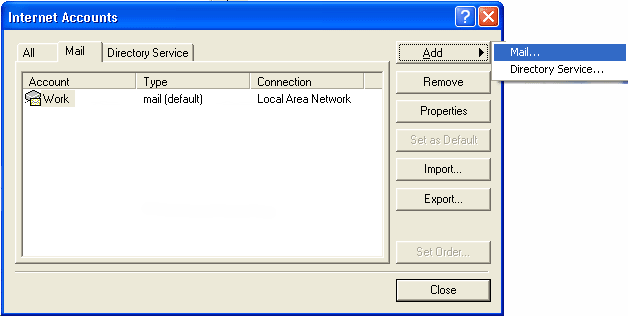
- Click the "Add" button.
- Select "Mail."
Step 3: Display Name
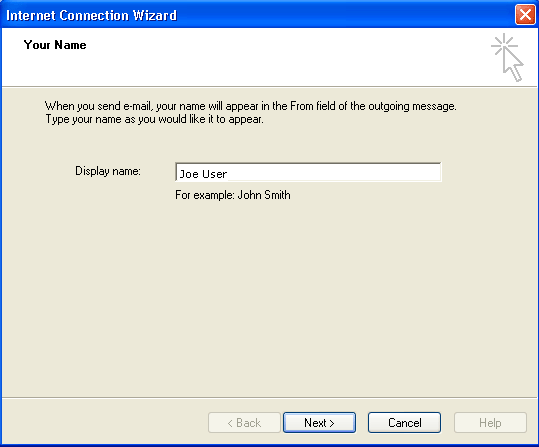
- Enter your name as you want it to appear in your outgoing messages.
- Click the "Next" button.
Step 4: Server Names
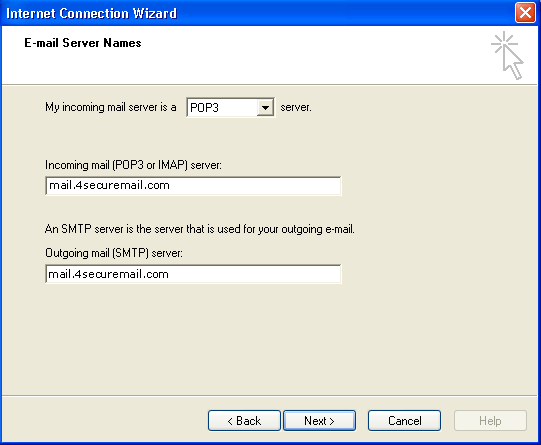
- Select "POP3" for my incoming mail server field.
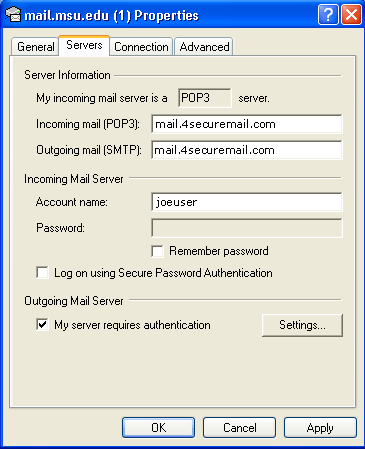
- Type mail.4securemail.com in BOTH of the "Incoming mail (POP3) server" and "Outgoing mail (SMTP) server" text fields.
- Click "Next."
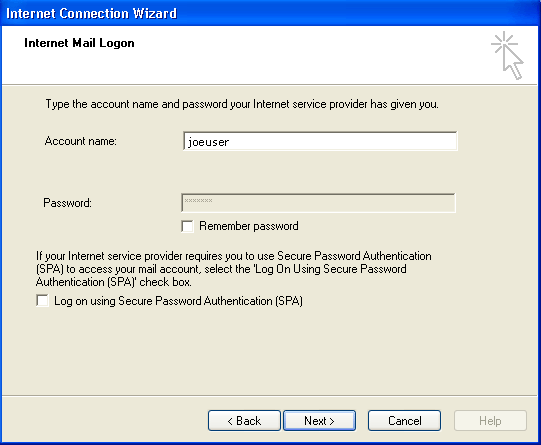
Step 5: User Credentials
- Enter your 4SecureMail account ID in the field "Account name" text field.
Enter your Email password (we recommend that you uncheck your "Remember my Password" checkbox to ensure added security to your account).
- Click "Next."
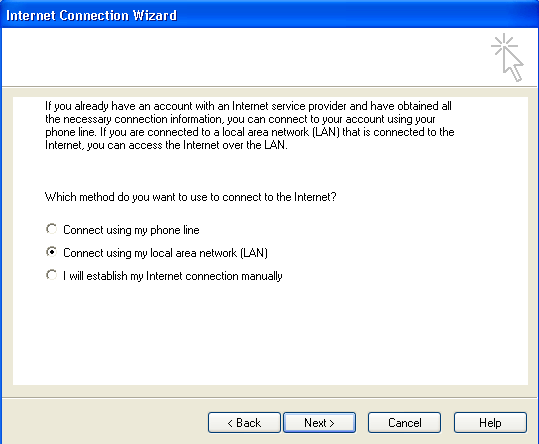
Step 6: Connection Type
- Select the type of your connection.
- Click "Next."
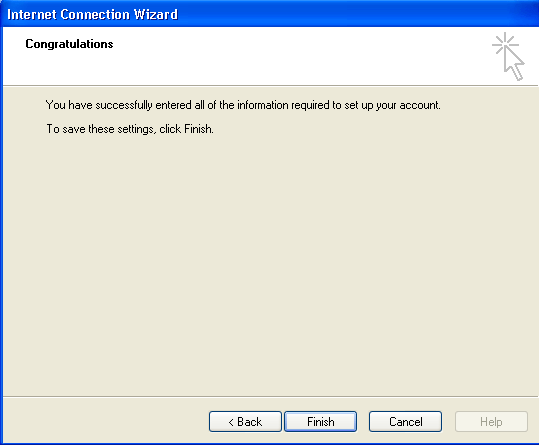
Step 7: Finish the Wizard
- Click the "Finish" button.
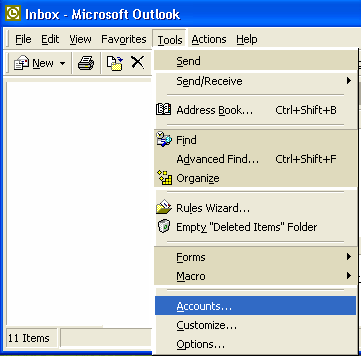
Step 8: Configuring the Account Settings (Part 1)
- You still need to configure your Email account to work with the 4SecureMail Email system.
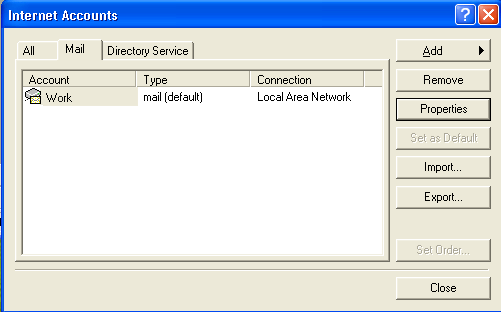
- Click the "Tools" pulldown menu and select "Accounts."
Step 9: Configuring the Account Settings (Part 2)
- Select the mail account that was just created from the list and then click the "Properties" button on the right.
Step 10: Advanced Configuration
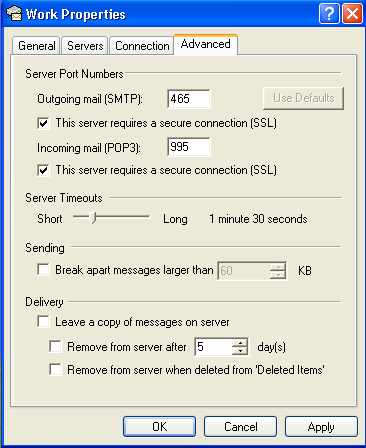
- Select the "Advanced" tab.
- Check the boxes in front of "This server requires a secure connection (SSL) for BOTH Outgoing and Incoming mail.
- Make sure that you change the "Outgoing Mail (SMTP)" number to 465, as shown in the screenshot below.
Step 11: Servers Configuration
- Click on "Servers" tab
- Check the boxes in front of "My server requires authentication"
- Click "OK."
Manufacturer Technical Support
For technical support from Microsoft, please visit https://support.microsoft.com/default.aspx?scid=sz;[ln];top.
|

