Secure Email, Secure IMAP Outlook SSL Configuration

Secure Email, Secure IMAP Outlook SSL Configuration |
| Secure Email Home | Secure Email Configuration Home |
|
|
|
Secure Email Hosting IMAP SSL - Configuring Outlook Express IMAP Secure Domain Email Customers: If your secure email account with us uses a domain name other than 4securemail.com, simply use your domain instead of 4securemail.com wherever it appears in the instructions or the examples given. If you have purchased your own IP address & certificate, you may substitute any reference of mail.4securemail.com with your mail host name, e.g. mail.yourdomain.com. This item provides information on these topics:
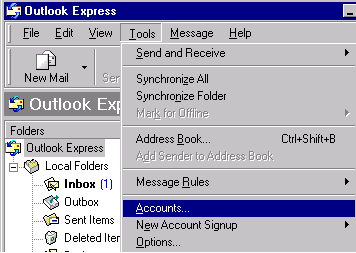
This document will help you to configure your Secure Outlook Express Email client to work with the 4SecureMail secure email hosting solution. Step 1: Create your Secure IMAP Email Account (Part 1) Start Outlook Express. On the "Tools" menu, click "Accounts."
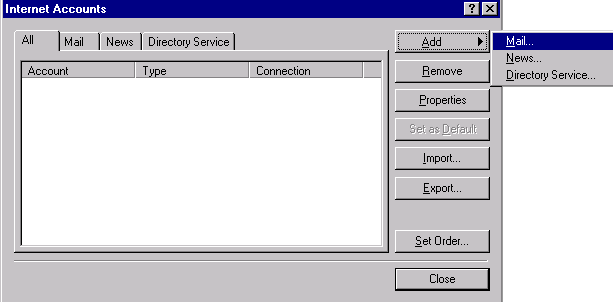
Step 2: Create your Secure IMAP Email Account (Part 2) In the Internet Accounts dialog box, click "Add," and then click "Mail."
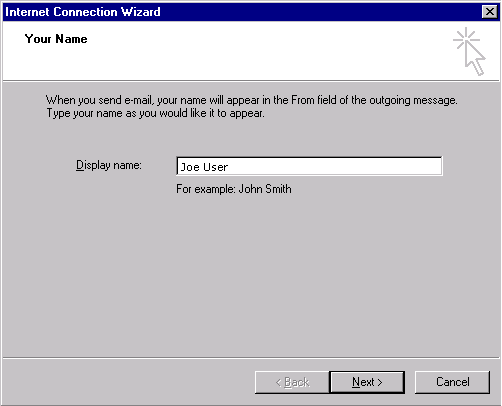
Step 3: Display Name In the "Display Name" box, type the name that you want others to see when you send a message, and then click "Next."
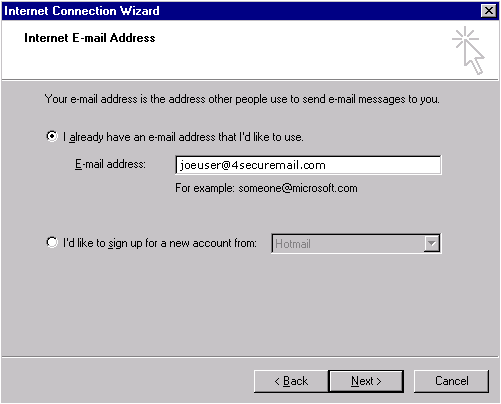
Step 4: Email Address In the "Emaill Address" box, type the Email address for the account that you are using (for example, "joeuser@4securemail.com"), and then click "Next."
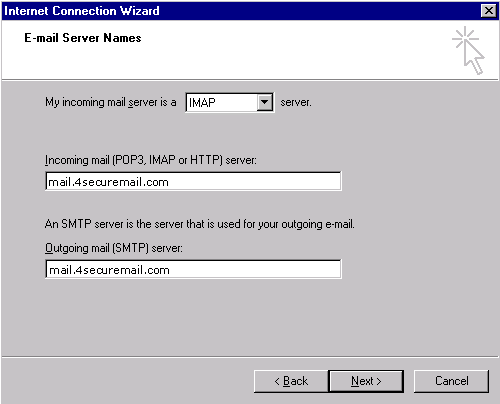
Step 5: Server Names Under "Emaill Server Names," choose the "IMAP" option, and then type mail.4securemail.com for BOTH your incoming and outgoing Email servers. Click "Next."
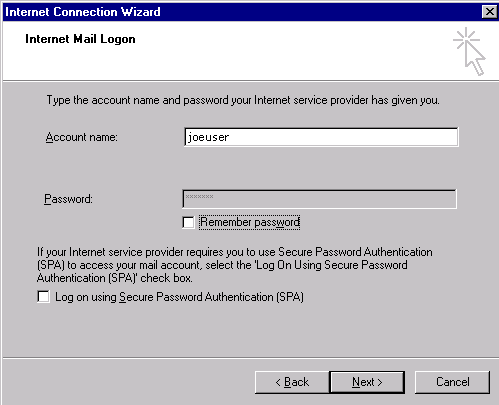
Step 6: User Credentials Enter your 4SecureMail user name in the field "Account name" text field.
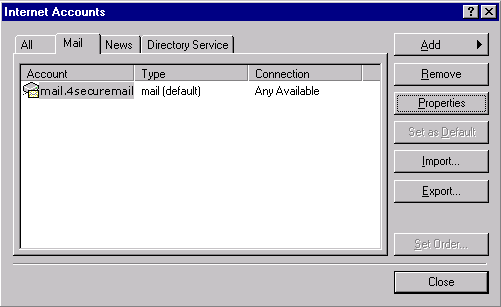
Step 7: Configuring the Secure Email Account Settings To configure your Email, select the mail account and click on the "Properties" button on the right.
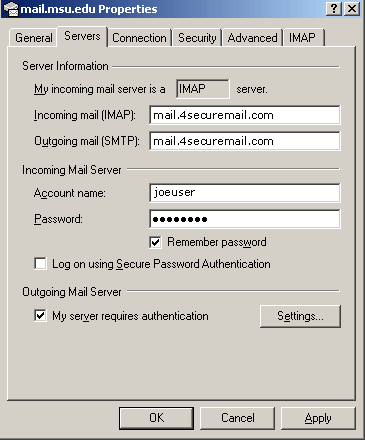
Step 8: Secure Servers Configuration Click on the "Servers" tab on the top and check the box "My server requires authentication."
Step 9: Advanced Secure Email Configuration
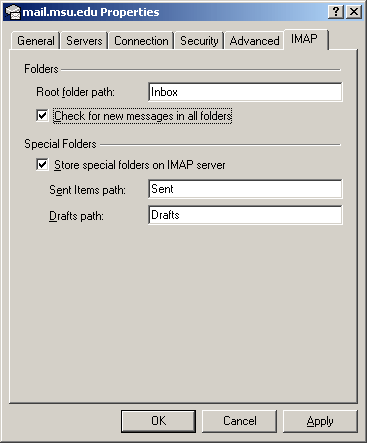
Step 10: Secure IMAP Configuration
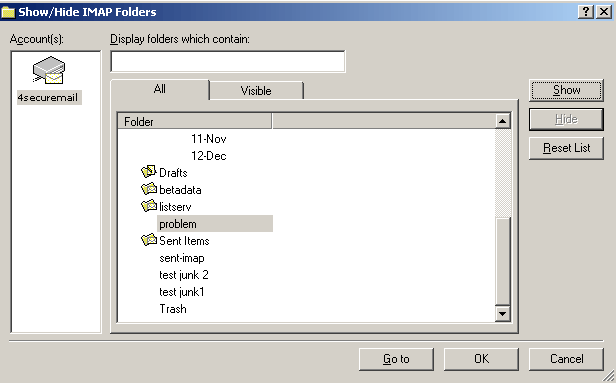
Step 11: IMAP Folders Select the "Tools" pulldown menu and select "IMAP Folders."
Step 12: Show IMAP Folders (Part 1)
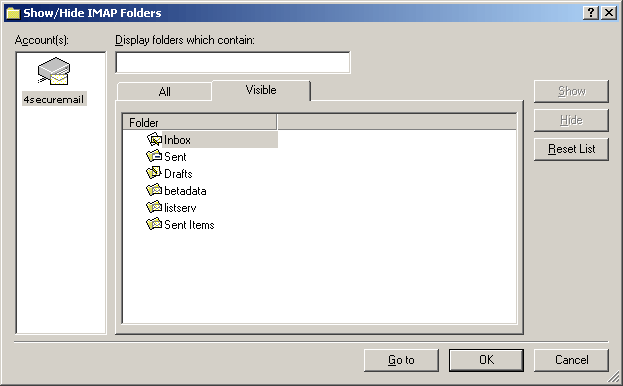
Step 13: Show IMAP Folders (Part 2)
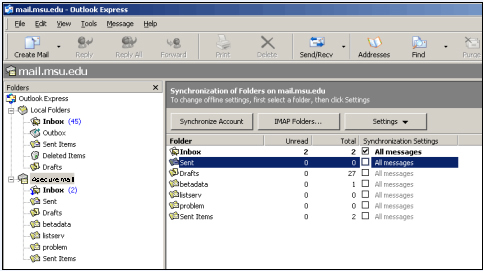
Step 14: Synchronization
Manufacturer Technical Support For technical support from Microsoft, please visit https://support.microsoft.com/default.aspx?scid=sz;[ln];top. |
|
|
| Secure Email Home | Secure Email Configuration Home |